

How To Repair Iphone Charger
Introduction
Apple charging cables, such as the Lightning to USB Cable, are easily prone to fraying. Most commonly, this fraying occurs from device usage while charging. Cables may be subject to extreme angles while charging which causes the outer coating to loosen, tear, and ultimately expose its wiring. Exposed cable wiring is hazardous to both the device and its user, and may cause electrical shorting or even shocking. Repairing a frayed cable with heat shrink is an easy and inexpensive alternative that allows the user to safely charge their device.
-
-
Locate the frayed or exposed area of the Lightning cable.
-
It may be necessary to further expose frayed areas for the repair. With your fingers, gently pull the cable wiring from its outer coating until they separate.
-
-
-
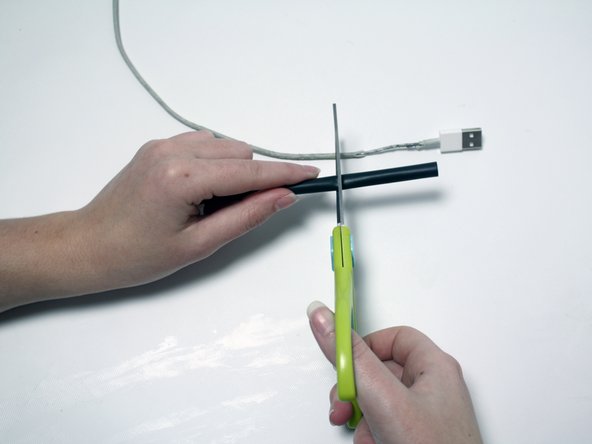
Remove the excess coating from the frayed area by cutting it off with scissors.
-
-
-
Measure the approximate length of heat shrink needed to cover the frayed or exposed area.
-
While cutting, keep the length of the heat shrink longer than the length of the frayed or damaged area.
-
-
-
Slide the heat shrink over the wire so that it covers the frayed or exposed area.
-
The 1/4" heat shrink used is not large enough to slide over the connector near the fraying. It may be necessary to slide the heat shrink over the opposite end of the charger.
-
-
-
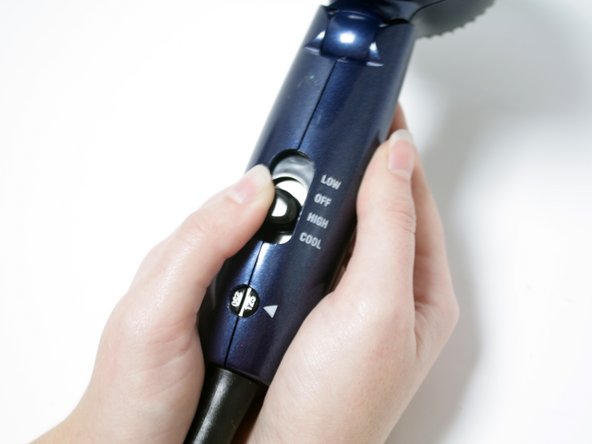
Warm up the hair dryer by turning it on the highest heat setting.
-
-
-
Apply heat to the heat shrink.
-
While heating, keep the hair dryer in motion. Applying heat for too long in one location will result in overheating. Overheating may further damage the frayed or exposed wire underneath, and it can even melt the heat shrink itself.
-
-
-
Allow the heat shrink to dry for two minutes.
-
-
-
Test the fit by flexing the cable in different directions.
-
If the fit is loose, apply an additional layer of heat shrink by recompleting Steps 3-7.
-


Conclusion
To reassemble your device, follow these instructions in reverse order.
Embed this guide
Choose a size and copy the code below to embed this guide as a small widget on your site / forum.
Preview
How To Repair Iphone Charger
Source: https://www.ifixit.com/Guide/How+to+Repair+a+Frayed+Apple+Lightning+Charger/73220
Posted by: harbershonserema.blogspot.com
0 Response to "How To Repair Iphone Charger"
Post a Comment